
Introduction:
Ditch the oven and dive into festive fun with No Bake Christmas Desserts! They’re bursting with holiday cheer and ready to steal the show. So here, our guide to stress-free celebrations brings you delightful no-bake Christmas desserts. Picture yourself enjoying the season’s warmth without the stress of a hot kitchen. So what are we waiting for? Let’s start to learn these easy recipes that require less effort and bring joy and sweetness in festival times
Peppermint Chocolate No-Bake Cheesecake: No Bake Christmas Dessert
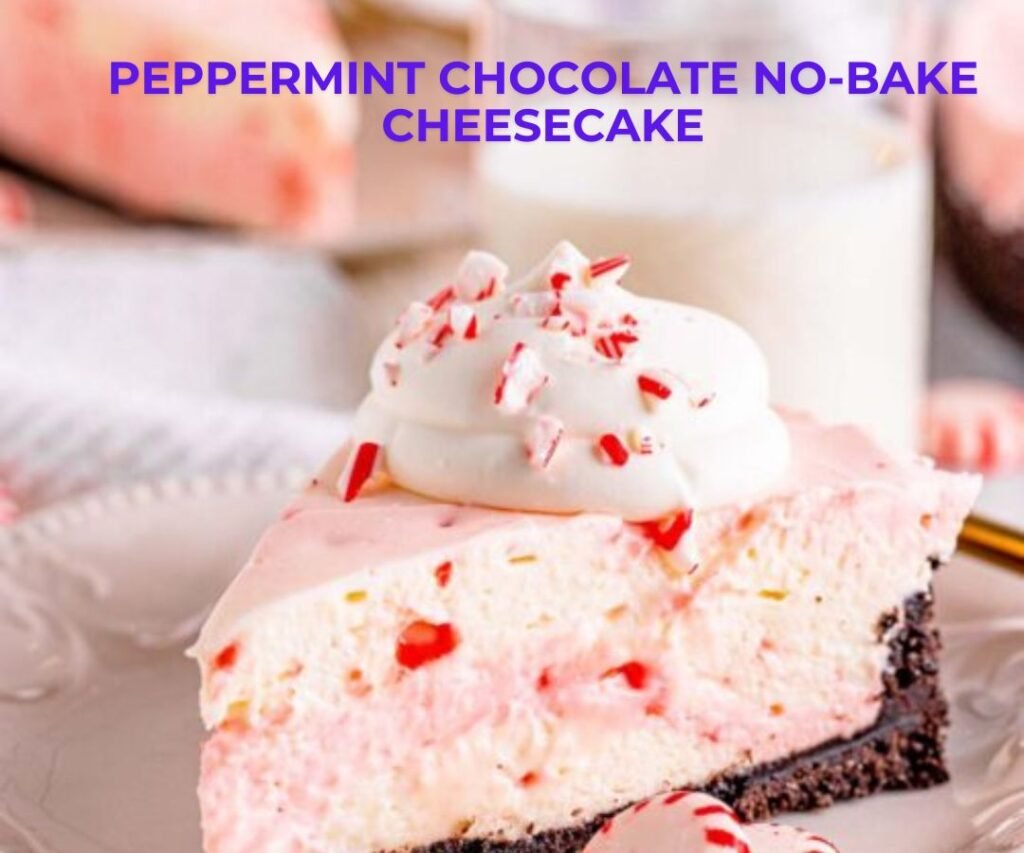
If you are craving for a holiday dessert that’s decadent, refreshing, and effortless? Look no further than this No Bake Christmas Dessert: Peppermint Chocolate Cheesecake! Imagine a creamy white filling infused with minty magic, nestled in a crunchy Oreo crust. It’s a symphony of textures and flavours, guaranteed to steal the show at any potluck or intimate gathering. And the best part? No oven is required! So, grab your mixing bowls, whip up this easy-to-follow recipe, and prepare to be showered with compliments.
Ingredients:
Crust:
- 1 1/2 cups crushed Oreos (about 24 cookies)
- 3 tablespoons melted butter
Filling:
- 16 oz. (2 cups) heavy whipping cream
- 8 oz. cream cheese, softened
- 14 oz. can sweetened condensed milk
- 1/2 teaspoon peppermint extract
- 1/4 teaspoon vanilla extract
- 1/4 cup mini chocolate chips (optional)
- Crushed candy canes for garnish (optional)
Instructions:
- Make the crust: In a medium bowl, combine crushed Oreos and melted butter. Mix well until crumbly. Press the Oreo mixture evenly into the bottom and up the sides of a 9-inch springform pan. Refrigerate for at least 30 minutes.
- Whip the cream: In a large bowl, using an electric mixer on high speed, whip the heavy whipping cream until stiff peaks form. Set aside.
- Mix the filling: In a separate bowl, using an electric mixer on medium speed, beat the cream cheese until smooth and creamy. Add the sweetened condensed milk, peppermint extract, and vanilla extract and beat until well combined.
- Fold in the whipped cream: Gently fold in the whipped cream into the cheesecake mixture until just combined. Be careful not to overmix.
- Assemble the cheesecake: Pour the cheesecake filling into the prepared Oreo crust. Sprinkle with mini chocolate chips if using. Smooth the top with a spatula.
- Chill and garnish: Refrigerate the cheesecake for at least 8 hours, or overnight, until set. Garnish with crushed candy canes before serving, if desired.
Tips:
- For a stronger peppermint flavour, you can use 1 teaspoon of peppermint extract instead of 1/2 teaspoon.
- You can also use crushed peppermint candies instead of candy canes for the garnish.
- If you don’t have a springform pan, you can use a 9-inch pie plate. Just be aware that the crust may be a little more challenging to remove.
- This cheesecake can be stored in the refrigerator for up to 3 days.
Enjoy this festive and delicious No Bake Christmas Desserts Peppermint Chocolate Cheesecake with your loved ones !
Gingerbread Truffles: Bite-sized Holiday Cheer
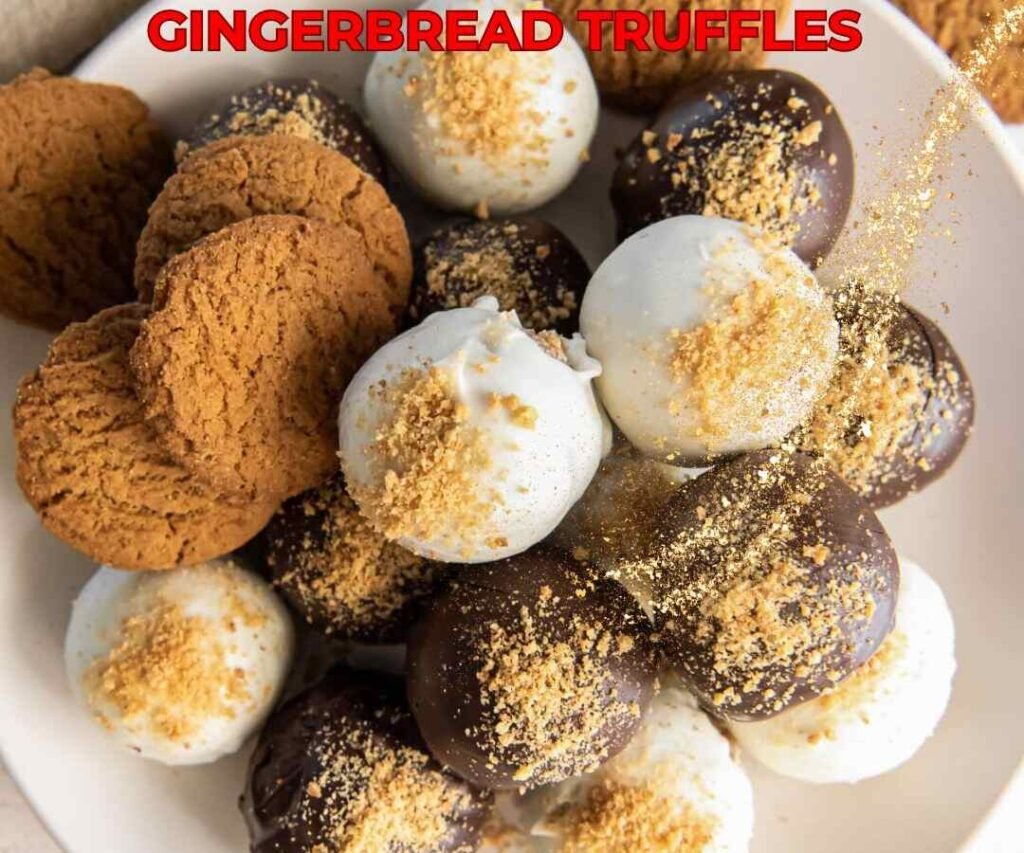
Dive into the festive sprit with these delightful Gingerbread Truffles a easy no bake christmas dessert for home ! They’re an easy, no-bake treat bursting with warm spices and rich chocolate. , they’re perfect for last-minute gifting or satisfying your holiday sweet tooth.
Ingredients:
- 150 g (5 oz) gingersnap cookies, crushed
- 100 g (3.5 oz) cream cheese, softened
- 2 tablespoons molasses
- 1 teaspoon ground ginger
- 1/2 teaspoon ground cinnamon
- 1/4 teaspoon ground nutmeg
- 12 oz melting chocolate (milk, dark, or white) – extra for drizzling (optional)
Instructions:
- Crush those gingersnaps: Pulse them in a food processor or crush them in a Ziplock bag with a rolling pin until fine crumbs form. Leave some larger pieces for texture, if desired.
- Creamy centre: In a large bowl, beat the softened cream cheese until smooth. Add the molasses, ginger, cinnamon, and nutmeg. Mix until well combined.
- Gingerbread dough: Gradually add the crushed cookies to the cream cheese mixture, mixing until it forms a sticky dough. Don’t worry if it seems a bit loose; it will firm up in the refrigerator.
- Shape and chill: Roll the dough into 1-inch balls and place them on a parchment-lined baking sheet. Chill for at least 30 minutes or until firm.
- Chocolate dip: Melt the chocolate in a double boiler or microwave until smooth. Dip each chilled truffle into the chocolate, coating it completely. Let the excess chocolate drip off before placing it back on the baking sheet.
- Cool and enjoy: Refrigerate the truffles for at least 2 hours or until the chocolate sets. Now, indulge in these bite-sized bursts of gingerbread bliss!
Tips:
- For a richer flavour, toast the crushed cookies in a dry pan for a few minutes before adding them to the cream cheese mixture.
- Get creative with the chocolate drizzle! Use a piping bag filled with melted white or dark chocolate to create festive designs on top of your truffles.
- These truffles can be stored in an airtight container in the refrigerator for up to 5 days.
Bonus variations:
- Peppermint Crunch: Add 1/4 teaspoon peppermint extract to the cream cheese mixture and sprinkle the truffles with crushed candy canes before the chocolate sets.
- Nutty Delight: Fold in 1/4 cup chopped walnuts or pecans into the dough for an extra crunch.
- Dipped & Dusted: For a more decadent treat, dip the chocolate-covered truffles in crushed gingerbread crumbs or coconut flakes before refrigerating.
Cranberry and Orange Bliss Balls: No Bake Christmas Recipe

Craving a festive treat that’s packed with flavour and easy on the effort? These No-Bake Cranberry and Orange Bliss Balls are your answer! Imagine chewy, tart-sweet bites bursting with juicy cranberries and zesty orange, all held together by a creamy date and oat base. They’re perfect for last-minute gifting, satisfying your holiday sugar craving, or adding a vibrant touch to any dessert platter.
Ingredients:
- 1 cup rolled oats
- 1/2 cup pitted Medjool dates
- 1/4 cup dried cranberries
- 1/4 cup chopped Almonds or Walnuts or mixture of both
- Zest and juice of 1 orange
- 2 tablespoons almond butter (or any nut butter)
- 1/4 teaspoon ground cinnamon
- Pinch of salt
Instructions:
- Pulse and grind: In a food processor, pulse the oats until finely ground. Add the dates and pulse again until they form a sticky paste.
- Citrusy goodness: Add the orange zest, juice, almond butter, chopped almonds, cinnamon, and salt. Process until well combined and a thick dough forms.
- Cranberry cheer: Fold in the chopped cranberries and walnuts (if using). Mix gently to distribute them evenly.
- Shape and chill: Roll the dough into 1-inch balls and place them on a parchment-lined baking sheet. Chill for at least 30 minutes or until firm.
- Optional dip: For an extra layer of flavour, melt some dark chocolate or white chocolate and dip the chilled balls halfway, letting the excess drip off before refrigerating again.
- Enjoy! Store your Cranberry and Orange Bliss Balls in an airtight container in the refrigerator for up to 5 days. Pop them in your mouth anytime for a delightful burst of holiday cheer!
Tips:
- For a sweeter treat, add a drizzle of honey or maple syrup to the dough before mixing in the cranberries.
- Substitute the walnuts with chopped almonds vice- versa, pecans, or even dried fruit for a different flavour twist.
- Get creative with coatings! Dip the balls in coconut flakes, crushed nuts, or edible glitter for a festive look.
- These bliss balls are a healthy snack option, too! Packed with fibre, dates, and nuts, they offer a satisfying and nutritious treat.
So ditch the oven and whip up a batch of these No-Bake Cranberry and Orange Bliss Balls! They’re the perfect way to celebrate the holidays with friends and family, one delicious bite at a time. Happy snacking!
No-Bake Eggnog Mousse: A Dreamy Holiday Delight
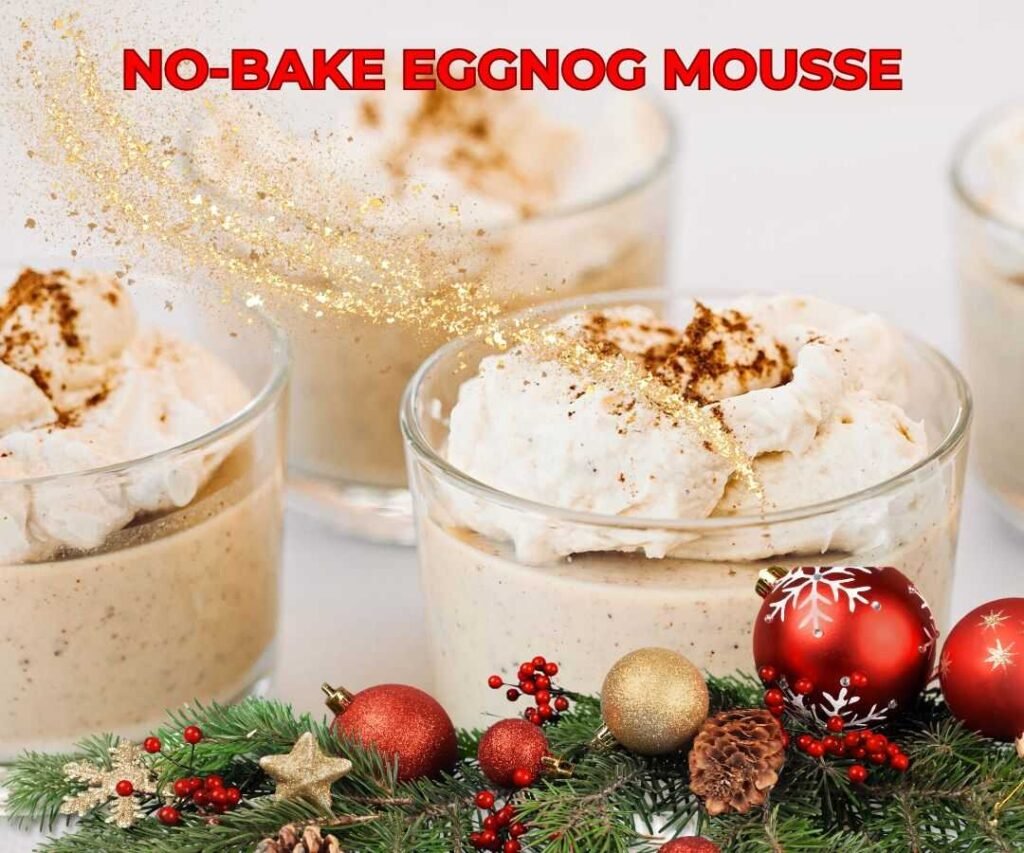
Craving the rich, creamy taste of eggnog but without the heat? This No-Bake Eggnog Mousse is your answer! Imagine a light and airy cloud of eggnog-infused sweetness, delicately layered with spiced rum and topped with a sprinkle of festive magic. It’s the perfect way to indulge your holiday spirit, impress guests, and satisfy your sweet tooth without turning on the oven.
Ingredients:
For the Mousse:
- 1 1/2 cups cold eggnog
- 1 package (3.4 oz) instant vanilla pudding mix
- 1/2 cup heavy whipping cream
- 1/4 teaspoon ground nutmeg
- Pinch of ground cloves (optional)
For the Spiced Rum Topping (optional):
- 1/4 cup heavy whipping cream
- 1 tablespoon brown sugar
- 1 tablespoon spiced rum
For the garnish (optional):
- Grated nutmeg
- Cinnamon sticks
- Candied cranberries
- Whipped cream
Instructions:
- Creamy base: In a large bowl, whisk together the eggnog and pudding mix until smooth and combined. No need for cooking! Let it sit for 5 minutes to thicken.
- Whip it up: In a separate bowl, using an electric mixer on high speed, whip the heavy cream until stiff peaks form. Gently fold the whipped cream into the eggnog mixture until just combined. Be careful not to overmix.
- Spiced touch: (Optional) In a small saucepan, combine the heavy cream, brown sugar, and spiced rum. Heat over medium heat, stirring constantly, until the sugar dissolves and the mixture thickens slightly. Let cool slightly before gently swirling it into the eggnog mousse.
- Chill and layer: Divide the mousse equally among individual serving dishes or glasses. Refrigerate for at least 3 hours or until set.
- Festive touches: (Optional) Garnish your mousse with a sprinkle of grated nutmeg, a cinnamon stick, a couple of candied cranberries, or a dollop of whipped cream. Get creative and make it your own!
- Enjoy! This no-bake wonder is best enjoyed chilled. So relax, gather your loved ones, and savour every decadent spoonful of this Eggnog Mousse. It’s a guaranteed holiday hit!
Tips:
- For a richer flavour, use homemade eggnog.
- Substitute the spiced rum with vanilla extract for a non-alcoholic option.
- Top with a drizzle of chocolate sauce or caramel for a decadent twist.
- Get creative with the garnish! Use chopped nuts, crushed candy canes, or even edible glitter for a festive touch.
- This mousse can be made up to 24 hours in advance, perfect for holiday parties or potlucks.
So ditch the complicated desserts and whip up this simple yet delightful No-Bake Eggnog Mousse. It’s the perfect way to embrace the holiday spirit and indulge in some eggnog magic! Happy holidays!
If you find no bake recipe for chirstmas interesting then you may also check out christmas decorations for your dinning decor.